 |
clearString neatComponents
|
|
clearString neatComponents Managing profile forms for users |
 | ||
 | Application Development |  |
Managing profile forms for users | ||
 |  |
The login system is primarily concerned with security, and stores fundamental data such as names and passwords. In many cases, however, it is useful to be able to store extra information about the users, and to allow them to manage it as part of the standard user registration and update processes.
Since the login system is locked down for security reasons, it makes sense to use a Table component to define the extra fields.
Each record in this Table is then Owned by a different User. The Login component can then be configured to allow a record in this Table to be created when a user registers, and updated if they update their details, all as part of the standard Login component forms. The essence of this feature is that the user can complete a single form, which when they submit it, stores the security fields in one place, and the custom fields for the profile in another, streamlining the user experience.
Method
First create your profile table, and add the fields you want to it. There is nothing ‘special’ about this table – it can contain whatever fields you like, and can have any name.
On the Login component, go to the Toolbox / Configure Log-in:
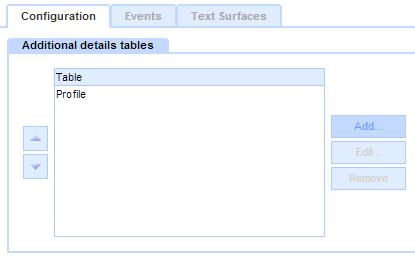
In the Configuration tab, click Add and choose your profile table.
Note that you can choose several tables, in which case a record will be maintained in each table for the user. However in most cases you will only need one profile table.

To control which fields are shown you have two choices:
- Default forms
These provide a rapid way to get started, but with limited flexibility for layout and styling. - Custom forms
These provide a very flexible interface, but needs a little more setup as you add embeds to the various surfaces involved.
Default forms
In the Login component, Behavior Editor, Settings, ...
- Options: Ensure "Log-in form", "Registration form" and "Update Details form" are set to "Default"
- Options, Default Forms, Field Display: Set "Show additional details table fields" to "Yes"
Now, when a user registers, or updates their details, the form will show the usual fields first, followed by the fields from the profile table. These fields will be shown in the order they are listed in the table confirmation dialog, and if you have several profile tables, they will be shown in the order the tables are listed in the login component’s configuration panel.
Custom forms
For finer control over the appearance of the login forms, see Customising the login forms
Copyright © 2026 Enstar LLC All rights reserved |
